Frequently Asked Question
(W52P/W60PKG)
Before you begin, ensure that you've created your extension in the your Dashboard.
Find the extension number you're configuring, then click Edit.

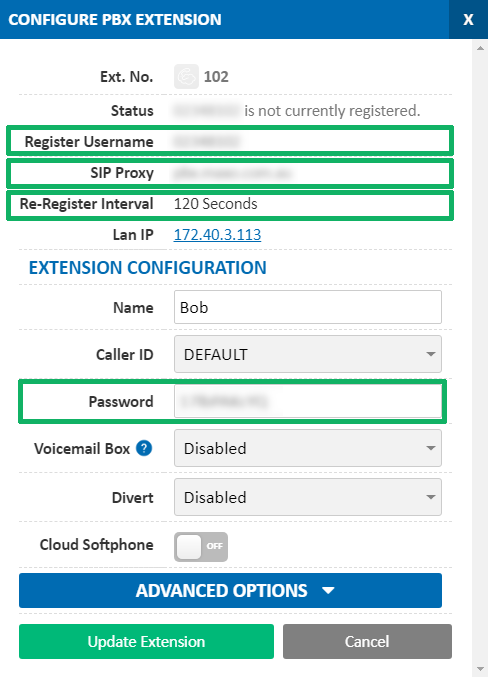
Take note of the following fields, highlighted in the image below, as you'll need these to setup the device.
- Register Username: This is the full username, not the short Ext No.
- SIP Proxy: The server you'll be connecting to.
- Re-Register Interval: Defines how often your device should check in.
- Password: The extension's password
Note that if the extension is already configured on a device, you'll need to reconfigure, power down or factory reset the currently connected device before the required information will be displayed.
NB: If your device has previously been used with another provider, please factory reset it before continuing. To do so from the base station, unplug the power then hold the 'Connect' button on the front while powering back up. Once all 3 lights are lit, you can release the Connect button and the unit will factory reset. To factory reset from a connected handset, choose Menu > Settings > System Settings > Base Reset.
To configure the Cordless base station Series to your MaxoTel account, first retrieve the IP Address so that you can log into the 'Web Configuration' via your computer. To do this, enter The IP Address of the device into your web browser. For instructions on how to obtain the IP address of your device, please see Yealink W60 / W52 / W56 Cordless Phones - How to get the Base IP address
Once you are on the Web Configuration page enter the username and password. By default the username will be 'admin' and the Password will be 'admin'.
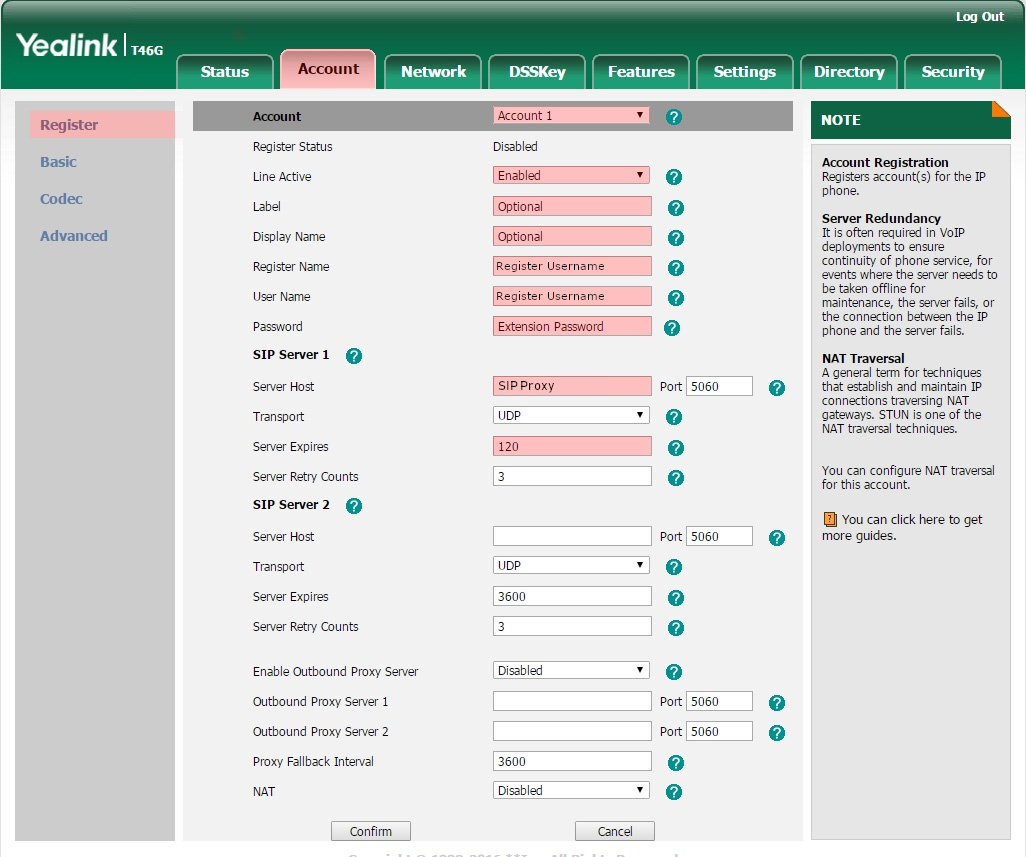
Once you have successfully logged in, click on the 'Account' tab across the top. Fill in the highlighted fields below, copying the Register Username, Extension Password and SIP Proxy from the configure PBX Extension dialog:
| Yealink | My Account Portal |
|---|---|
| Register Name | Register Username |
| User Name | Register Username |
| Password | Password |
| Server Host | SIP Proxy (normally pbx.maxo.com.au for Hosted PBX, or sip.maxo.com.au for SIP trunking plans |
If you are only using one handset with this base station, then the setup should be complete.
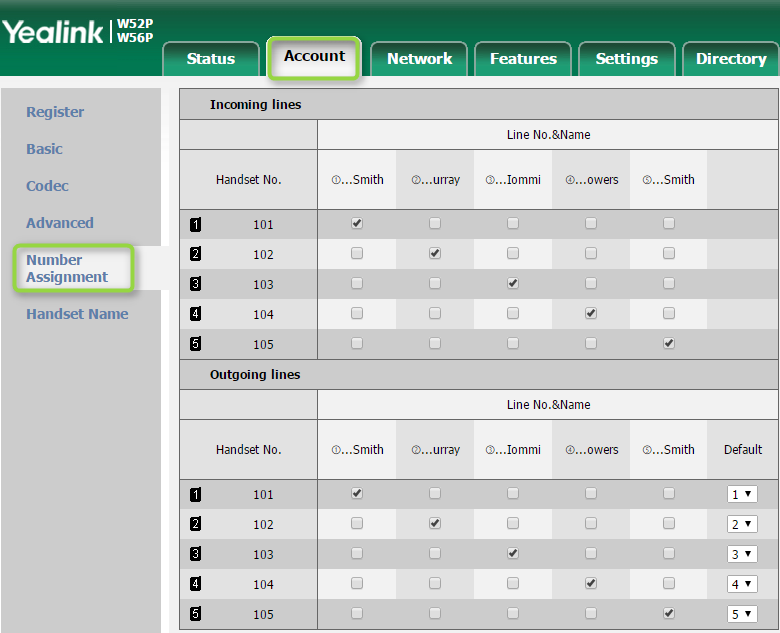
If you are using multiple handsets on the one base station, you can either have all handsets use the one Extension, or configure individual Extensions for each phone, and assign them accordingly in the 'Number Assignment' page.
In the Incoming Lines table, select which phones (left column) should ring when a call is received on each extension registered to the phone (top row)
In the Outgoing Lines table, select the Default account (right column) that each handset (left column) should use when making outbound calls.
For example, if you have 5 extensions and 5 handsets registered to one base station, and would like each handset to use only its own extension for inbound and outbound, your configuration would look similar to this:
In addition, if you're using a W60B base station and have more than 4 handsets, you'll also need to change Features > General Information > Number of Active Handsets to 8. The W52P base only supports 4 active calls.
If you require more information on this part, please don't hesitate to contact us.
Now that the extension is registered you will now want to set the time zone and time format, which can be done under the top 'Phone' tab, and then the 'Preferences' button on the left.
At this point, the phone should be ready to go.